


⏲️ Estimated reading time: 4 min
Table of Contents
How To Enable Hardware-accelerated GPU Scheduling in Windows Settings. Hardware-accelerated GPU scheduling can boost gaming performance and reduce latency in Windows. In this guide, we’ll explain what it is, how it works, and provide a step-by-step tutorial to enable it safely for smoother graphics and improved responsiveness.
🖥️ Windows 10
Windows 10 (version 2004 and later) and Windows 11 introduced a hidden but powerful feature called Hardware-accelerated GPU scheduling (HAGS). This option allows your graphics card to manage its own memory more efficiently, reducing CPU overhead and enhancing responsiveness in graphics-heavy tasks.
For gamers, video editors, and anyone using GPU-intensive applications, enabling HAGS can provide noticeable benefits especially when paired with modern NVIDIA or AMD graphics cards.
In this article, we’ll cover:
- What hardware-accelerated GPU scheduling actually does.
- Its advantages and limitations.
- Step-by-step instructions to enable it.
- Troubleshooting tips if the option doesn’t appear.
⚡ What is Hardware-accelerated GPU Scheduling?
Traditionally, the CPU handles graphics scheduling, deciding how GPU tasks are queued and executed. This process adds a layer of latency and can bottleneck performance in demanding situations.
With hardware-accelerated GPU scheduling, the GPU takes over scheduling tasks directly, freeing up CPU resources and lowering frame rendering latency.
Key Benefits:
- Lower latency → Better responsiveness in games.
- Improved frame stability → Less stuttering in some cases.
- Reduced CPU load → Helpful for weaker CPUs paired with strong GPUs.
🎮 System Requirements for HAGS
Not every PC supports hardware-accelerated GPU scheduling. Here’s what you need:
- Windows 10 version 2004 (May 2020 Update) or newer / Windows 11
- Compatible GPU:
- NVIDIA: GeForce GTX 1000 series (Pascal) or newer.
- AMD: Radeon RX 5600 / 5700 or newer.
- Intel: Integrated GPUs on 10th Gen CPUs or later.
- Up-to-date drivers: Install the latest NVIDIA, AMD, or Intel drivers.
⚙️ How To Enable Hardware-accelerated GPU Scheduling
Follow these steps carefully:
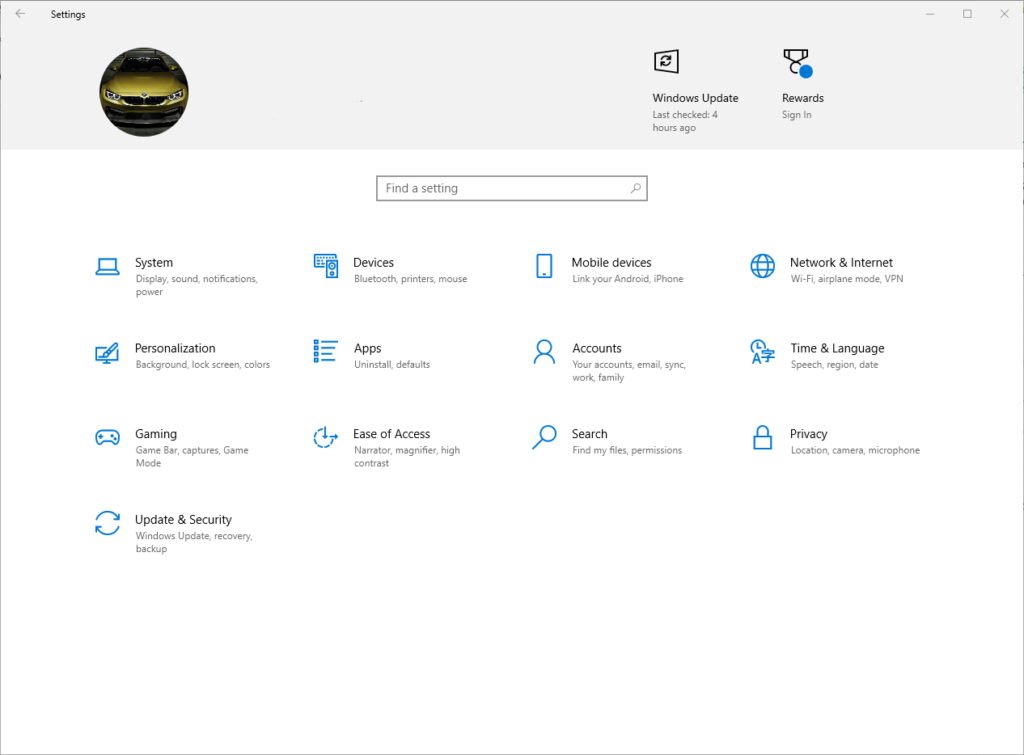
1: Open Windows Settings
- Press Windows + I to open the Settings app.
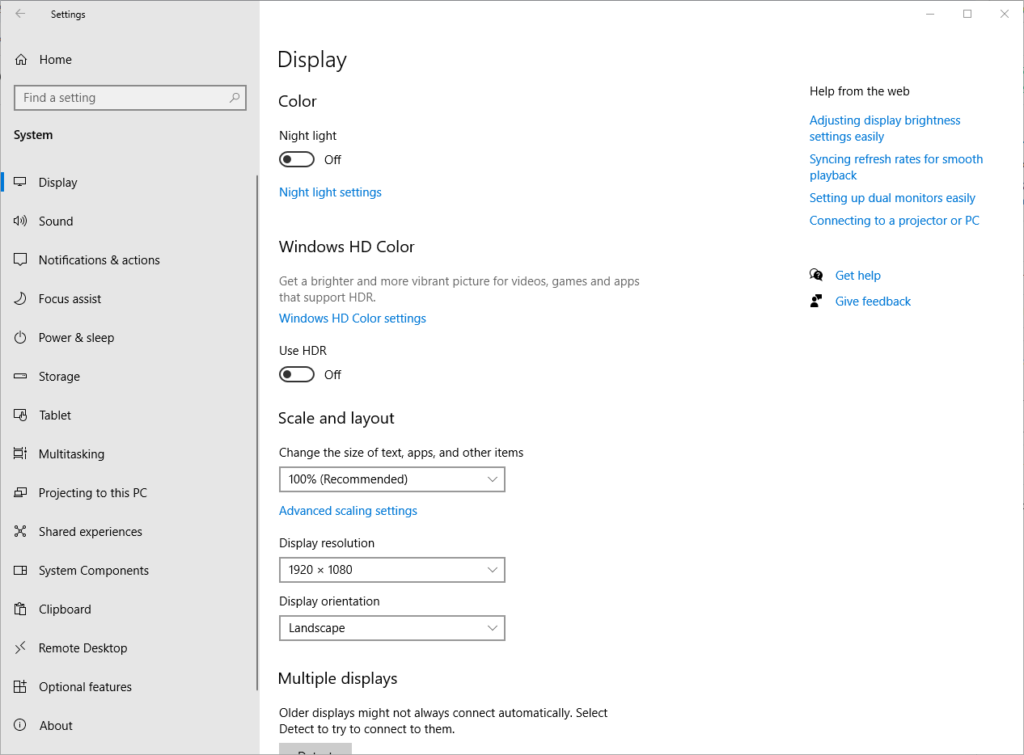
- Go to System > Display.
2: Access Graphics Settings
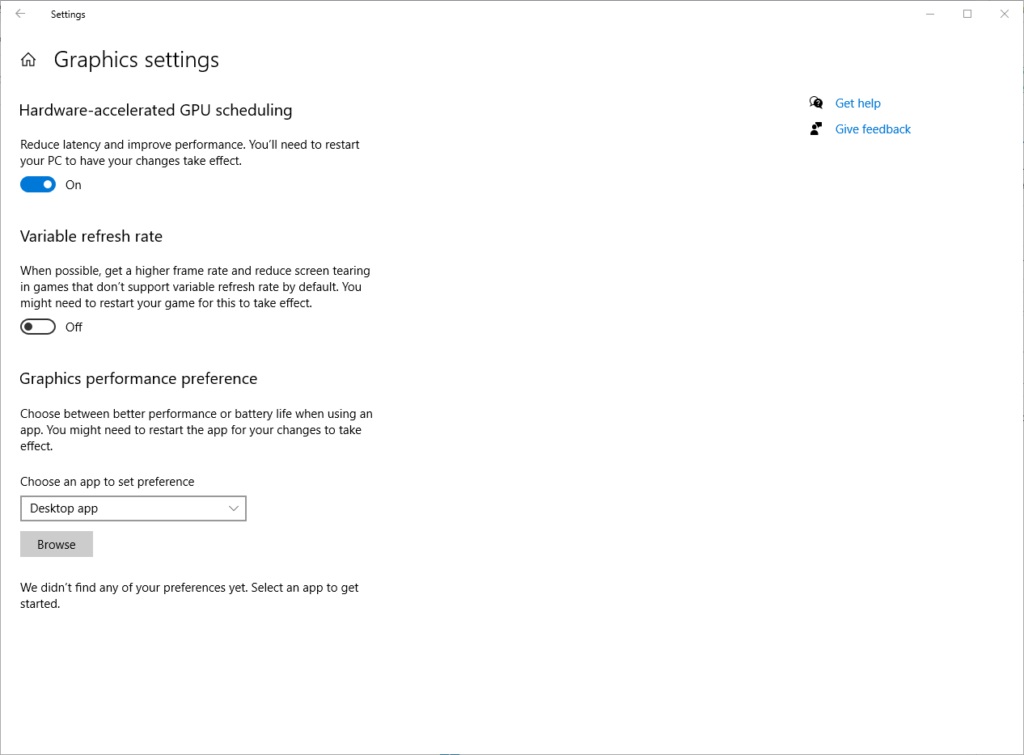
- Scroll down and click Graphics settings (found under Related settings).
3: Enable GPU Scheduling
- Under Default settings, you’ll see Hardware-accelerated GPU scheduling.
- Toggle the switch to On.
4: Restart Your PC
- Restart is required for changes to take effect.
✅ Done! Hardware-accelerated GPU scheduling is now enabled.
🔍 What If You Don’t See the Option?
If HAGS doesn’t appear in your settings:
- Update Windows → Install the latest version.
- Update GPU drivers → Use NVIDIA GeForce Experience, AMD Adrenalin, or Intel Arc drivers.
- Check GPU support → Older cards may not support HAGS.
- Registry Edit (Advanced):
- Press Windows + R, type
regedit, and open the Registry Editor. - Navigate to:
HKEY_LOCAL_MACHINESYSTEMCurrentControlSetControlGraphicsDrivers - Create a DWORD (32-bit) Value named
HwSchMode. - Set value to 2 (enabled).
- Restart PC.
- Press Windows + R, type
(⚠️ Use registry tweaks carefully!)
🧪 Should You Enable HAGS?
While hardware-accelerated GPU scheduling can improve performance, results vary:
- For gamers: Potentially smoother gameplay and reduced latency.
- For video editors: Faster preview rendering.
- For low-end PCs: Mixed results; may cause instability in some cases.
👉 Best practice: Enable it, test your favorite games/apps, and keep it on if performance improves.
🚨 Common Issues After Enabling
- Game crashes or stuttering → Update drivers.
- No noticeable change → Not all games benefit.
- System instability → Disable the feature.
You can toggle it anytime by revisiting the Graphics settings menu.
🔧 Additional Performance Tweaks
If you want maximum performance alongside HAGS, also consider:
- Enable Game Mode in Windows.
- Update GPU drivers regularly.
- Set power plan to High Performance.
- Adjust in-game graphics settings for optimal balance.
Final Thoughts
Hardware-accelerated GPU scheduling is one of Microsoft’s lesser-known but powerful features. It won’t magically double your FPS, but it can give smoother frame pacing, better responsiveness, and reduced latency for supported games and apps.
If you have a modern GPU and Windows version, enabling HAGS is worth a try it’s quick, safe, and easy to toggle back if you notice problems.
🔔 For more tutorials like this, consider subscribing to our blog.
📩 Do you have questions or suggestions? Leave a comment or contact us!
🏷️ Tags: Windows 11, Windows 10, GPU scheduling, Hardware acceleration, NVIDIA, AMD, Intel graphics, Gaming performance, Windows settings, PC optimization
📢 Hashtags: #Windows11, #Windows10, #GPU, #NVIDIA, #AMD, #Intel, #Gaming, #Performance, #Optimization, #Tutorial
Read also: When the One You’d Take a Bullet For Pulls the Trigger
