

⏲️ Estimated reading time: 7 min
Table of Contents
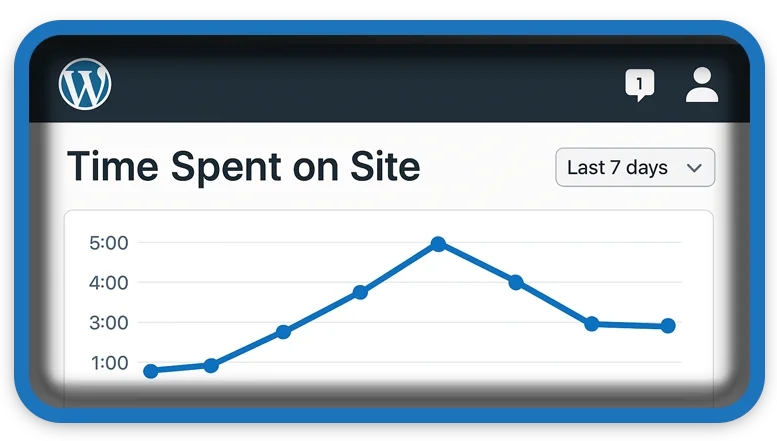
Here’s a simple WordPress function that Show Time, how long a visitor has been on your site. It uses JavaScript to track the time and displays it anywhere on your site using a shortcode.
🛠️ Optional Enhancements WordPress Function
🕒 How to Show How Long a Visitor Has Been on Your WordPress Site (With Shortcode + JavaScript). Want to display how long a visitor has been browsing your WordPress site? In this detailed tutorial, we’ll show you how to build a shortcode that tracks visitor time with JavaScript, step by step. Perfect for engagement, gamification, and custom user experiences.
Have you ever wanted to show visitors how long they’ve been on your website? Maybe you’re running an online course, an interactive blog, or even a gamified experience where visitor time matters. WordPress makes this possible with just a few lines of PHP and JavaScript, combined into a shortcode you can place anywhere on your site.
In this tutorial, we’re going to build a visitor timer shortcode that tracks the exact duration a user has been on your page and displays it in real time. You’ll also learn how to customize it, add styles, and even extend it into a mini plugin if you want.
By the end of this post, you’ll have a working shortcode [visitor_time] that you can drop into any WordPress post, page, or widget to display a live counter of how long a visitor has been on your site.
Why Display Visitor Time?
You may also be interested in: Happy Birthday Chuck Norris: The Legend Turns 85
Before diving into the code, let’s explore why this feature can be powerful for your site:
- Engagement Boost – Visitors notice a live timer, which keeps them curious and engaged.
- Gamification – Works great for websites that reward users for spending time (loyalty points, badges, ranks).
- Learning Tools – Online courses can show how long students spend on each lesson.
- Transparency – News or blog sites can tell readers how long they’ve been reading.
- Interactive Fun – A timer adds personality and playfulness to your brand.
This little snippet can transform the way visitors interact with your site.
The Code: Visitor Time Shortcode
Here’s the complete code you’ll need:
<?php
/**
 * Show Visitor Time on Site
 * Shortcode: [visitor_time]
 */

// Register shortcode
function hz_visitor_time_shortcode() {
    ob_start(); ?>

    <div id="visitor-time">You’ve been here for <span id="time-spent">0</span> seconds.</div>

    <script>
    (function() {
        let seconds = 0;
        const timeSpan = document.getElementById('time-spent');

        function updateTime() {
            seconds++;
            let hrs   = Math.floor(seconds / 3600);
            let mins  = Math.floor((seconds % 3600) / 60);
            let secs  = seconds % 60;

            // Format with leading zeros
            let display =
                (hrs > 0 ? hrs + "h " : "") +
                (mins > 0 ? mins + "m " : "") +
                secs + "s";

            timeSpan.textContent = display;
        }

        setInterval(updateTime, 1000);
    })();
    </script>

    <?php
    return ob_get_clean();
}
add_shortcode('visitor_time', 'hz_visitor_time_shortcode');
This code is short, lightweight, and safe to use.
Step-by-Step Explanation
1. Shortcode Registration
add_shortcode('visitor_time', 'hz_visitor_time_shortcode');
This line tells WordPress:
“When someone uses [visitor_time] in a post or page, run the function hz_visitor_time_shortcode.”
2. Output Buffering
ob_start();
...
return ob_get_clean();
We use output buffering so the function can return HTML + JavaScript as a single string. WordPress shortcodes need to return output, not echo it.
3. HTML Container
<div id="visitor-time">You’ve been here for <span id="time-spent">0</span> seconds.</div>
This creates a placeholder where the timer will appear. The <span id="time-spent"> gets updated every second.
4. JavaScript Timer
let seconds = 0;
function updateTime() {
    seconds++;
    let hrs = Math.floor(seconds / 3600);
    let mins = Math.floor((seconds % 3600) / 60);
    let secs = seconds % 60;
}
The JavaScript increments seconds every second and formats it into hours, minutes, and seconds.
5. Live Update
setInterval(updateTime, 1000);
This runs updateTime() every 1000 milliseconds (1 second), making the timer live.
How to Add This to Your WordPress Site
- Open your child theme’s
functions.phpfile (or create a small plugin). - Copy and paste the full code above.
- Save the file.
- Go to any WordPress post or page.
- Insert
[visitor_time]where you want the timer to appear.
That’s it! The timer will start counting as soon as the page loads.
Styling the Timer with CSS
You can make the timer look nicer with custom CSS. For example:
#visitor-time {
    font-size: 18px;
    font-weight: bold;
    color: #2c3e50;
    background: #ecf0f1;
    padding: 10px 15px;
    border-radius: 8px;
    display: inline-block;
}
This makes it stand out as a styled badge.
Possible Customizations
This code is flexible. Here are some ways you can extend it:
- Show Only Minutes/Seconds – Remove hours if not needed.
- Custom Message – Change “You’ve been here for” to anything you like.
- Session Tracking – Store time in cookies or localStorage to persist between page reloads.
- Gamification – Award points after a user stays for X minutes.
- Dashboard Widget – Show admin how long users typically stay (requires PHP + database).
- Multiple Timers – Add variations such as “Time on Page” vs “Time on Site.”
- Animated Effects – Use CSS transitions to make the timer blink, pulse, or slide.
- Convert to Plugin – Package the snippet into a plugin with settings.
Advantages of Using This Shortcode
- Lightweight: No plugins needed.
- Customizable: Easy to edit for your brand.
- Instant: Works as soon as the page loads.
- Portable: Use
[visitor_time]anywhere.
Real-World Use Cases
- Online Learning Platforms – Track how long a student stays on a lesson page.
- News Sites – Show readers “You’ve been reading for 5 minutes.”
- Blogs – Add a playful element for visitors.
- E-commerce – Display a timer for limited-time offers or flash sales.
- Community Sites – Encourage users to stay engaged with badges like “You’ve been here for 30 minutes – you’re awesome!”
SEO Considerations
While this feature doesn’t directly boost SEO, it can reduce bounce rate and increase session duration both of which are positive user engagement signals that may indirectly benefit rankings. Plus, it makes your site unique and memorable.
Troubleshooting Common Issues
- Timer Not Showing? Make sure you added the shortcode
[visitor_time]. - Code Not Working? Ensure you pasted it inside your child theme
functions.phpand not inside the main theme. - Conflict with Other Scripts? Wrap JavaScript in an IIFE (which we already did) to prevent global variable conflicts.
- Text Overlap on Small Screens? Adjust with responsive CSS.
- Caching Issues? If you use aggressive caching, make sure JavaScript is not being delayed.
Extended Example: Persistent Timer with LocalStorage
If you want the timer to continue even after refreshing the page, you can use localStorage:
(function() {
    let startTime = localStorage.getItem('visitStartTime');
    if (!startTime) {
        startTime = Date.now();
        localStorage.setItem('visitStartTime', startTime);
    }
    const timeSpan = document.getElementById('time-spent');

    function updateTime() {
        let elapsed = Math.floor((Date.now() - startTime) / 1000);
        let hrs   = Math.floor(elapsed / 3600);
        let mins  = Math.floor((elapsed % 3600) / 60);
        let secs  = elapsed % 60;
        let display =
            (hrs > 0 ? hrs + "h " : "") +
            (mins > 0 ? mins + "m " : "") +
            secs + "s";
        timeSpan.textContent = display;
    }

    setInterval(updateTime, 1000);
})();
This way, even if the visitor reloads the page, the timer continues.
Wrap-Up
Adding a visitor timer shortcode to WordPress is a small but powerful way to improve engagement. It’s lightweight, fun, and easy to set up even for beginners. With just a bit of PHP and JavaScript, you can give your site an interactive edge.
This tutorial showed you the full code, explained it step by step, and offered customization ideas.
🔔 For more tutorials like this, consider subscribing to our blog.
📩 Do you have questions or suggestions? Leave a comment or contact us!
🏷️ Tags: WordPress shortcode, WordPress timer, visitor time tracking, JavaScript WordPress, custom functions, shortcode tutorial, timer plugin, WP snippets, engagement tools, WordPress development
📢 Hashtags: #WordPress, #Shortcode, #Tutorial, #JavaScript, #WebDevelopment, #WPBeginner, #CodeSnippet, #WPPlugin, #Engagement, #BloggingTips
