

⏲️ Estimated reading time: 6 min
Table of Contents
✅ cPanel Manage My Databases and How to Use It. Discover how to use cPanel’s Manage My Databases feature to efficiently create, modify, and manage your website’s MySQL databases with ease even if you’re a beginner. This guide will walk you through everything step by step.
📘 Introduction to cPanel’s Database Management
If you’re managing a WordPress site, Joomla, Drupal, or any web app that needs a backend database, you’re almost certainly using MySQL databases. On most hosting providers, cPanel is the control panel that makes managing these databases straightforward through its Manage My Databases section.
The Manage My Databases tool is where you’ll create, modify, delete, or back up databases and users without needing to write SQL commands manually.
This article will guide you step-by-step on how to:
- Create and manage MySQL databases.
- Add users and assign privileges.
- Delete databases and users safely.
- Access phpMyAdmin for advanced tasks.
- Automate backups and handle common issues.
Let’s get started!
🎯 What is “Manage My Databases” in cPanel?
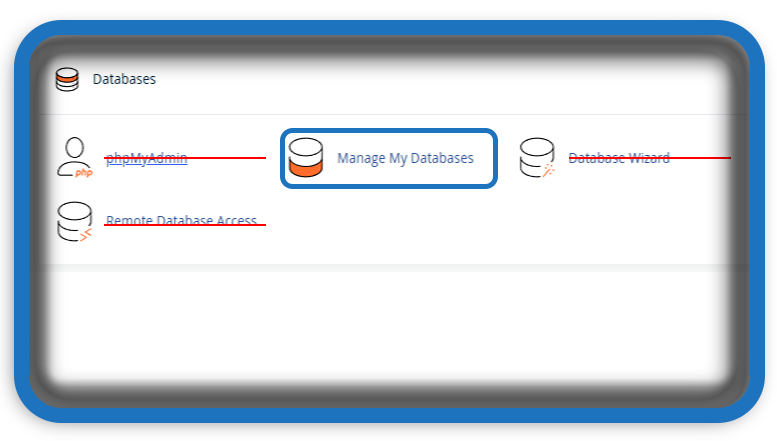
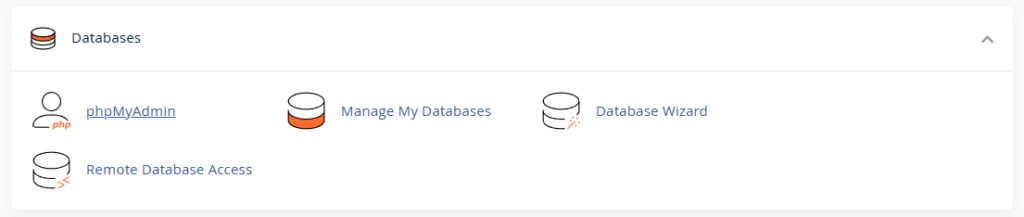
The Manage My Databases interface in cPanel refers to a group of tools that help users work with databases. These tools include:
- MySQL® Databases
- MySQL® Database Wizard
- phpMyAdmin
- Remote MySQL
These sections allow you to perform all database-related tasks without using the terminal or remote access tools.
Here’s a brief look at each:
- MySQL® Databases: Lets you create/delete databases and manage database users.
- MySQL® Database Wizard: Step-by-step interface to guide beginners through creating databases and assigning users.
- phpMyAdmin: Web-based interface for managing database content directly.
- Remote MySQL: Allows remote servers to access your databases securely.
🛠️ How to Access “Manage My Databases” in cPanel
- Log in to your cPanel account.
- Scroll down to the Databases section.
- Click on MySQL® Databases or use the Database Wizard for guided setup.
From here, you’ll be able to manage everything from database creation to user privileges.
🧱 Step-by-Step: Creating a Database
- Go to MySQL® Databases.
- Under Create New Database, enter a name (e.g.,
wp_blog). - Click Create Database.
- cPanel confirms the database has been created.
Best Practice: Use meaningful database names that match your app or site to avoid confusion later.
👥 Adding a Database User
Next, you need to create a user and assign it to your new database.
- Scroll to MySQL Users > Add New User.
- Enter a username and secure password (or use the password generator).
- Click Create User.
This user now exists but has no privileges yet.
🔐 Assigning User to Database
- Scroll to Add User To Database.
- Select the user and database from the dropdowns.
- Click Add.
- On the privileges screen, choose:
- ALL PRIVILEGES for full control (typical for WordPress, etc.)
- Or select specific permissions if needed.
- Click Make Changes.
✅ Done! Your user now has access to the database.
🧹 Deleting Databases and Users Safely
Deleting a database or user is irreversible unless you’ve backed it up.
To delete a database:
- Scroll to Current Databases
- Click Delete next to the database name
- Confirm deletion
To delete a user:
- Scroll to Current Users
- Click Delete next to the username
⚠️ Tip: Always create a full backup before deletion.
💡 Using the MySQL Database Wizard (Recommended for Beginners)
This tool simplifies the entire process into four steps:
- Create a database
- Create a user
- Assign user to database
- Set privileges
Navigate to MySQL® Database Wizard, and follow the prompts.
This is especially helpful for users unfamiliar with separate configuration screens.
See also: What is the Purpose of the Yoast SEO Plugin in WordPress?
🧠 Understanding Database Privileges
When assigning privileges, you can control what each user can do:
| Privilege | Description |
|---|---|
| SELECT | Read data |
| INSERT | Add data |
| UPDATE | Modify data |
| DELETE | Remove data |
| CREATE | Make tables |
| DROP | Remove tables or DB |
| INDEX | Add indexes |
| ALTER | Modify tables |
| GRANT | Grant permissions to others |
Use ALL PRIVILEGES when installing CMSs like WordPress, but limit access if security is a concern.
🧪 Managing Databases via phpMyAdmin
phpMyAdmin allows you to interact with your database using a graphical web interface.
To access:
- Go back to cPanel main dashboard.
- Click phpMyAdmin under the Databases section.
- Select your database on the left sidebar.
From here, you can:
- Run SQL queries
- View/Edit tables
- Import/Export data
- Perform backups
- Optimize tables
It’s a powerful tool that’s ideal for developers and advanced users.
📤 Importing and Exporting Databases
To Export:
- In phpMyAdmin, select your DB.
- Click Export.
- Choose Quick and SQL format, click Go.
- Save the file to your local machine.
To Import:
- Click Import in phpMyAdmin.
- Choose a file (usually
.sql). - Click Go.
This feature is crucial when moving sites or switching hosts.
🌍 Enabling Remote Database Access
If you want to allow external applications or servers to connect:
- Go to Remote MySQL in cPanel.
- Enter the host/IP (e.g.,
203.0.113.5). - Click Add Host.
Security tip: Only allow specific IPs and disable remote access when not in use.
🛡️ Database Security Best Practices
- Use strong passwords for users.
- Limit privileges to what’s needed.
- Regularly update CMS plugins/themes to avoid SQL injection.
- Backup databases regularly.
- Avoid using the root database account for applications.
💾 Automating Database Backups
Many hosting providers offer backup tools, but you can also back up manually:
1: via phpMyAdmin
- Use Export as mentioned above.
2: cPanel Backup
- Go to Backup or Backup Wizard
- Download your databases in
.sql.gzformat
3: Scheduled Cron Jobs (Advanced)
- Create automated scripts to dump your database at regular intervals.
❓Common Issues and Fixes
| Issue | Fix |
|---|---|
| Access denied | Ensure the user has proper privileges |
| Database not listed | Refresh or relogin to cPanel |
| Can’t connect via app | Check DB name, user, password, and host |
| Import errors | Check file size limits and format compatibility |
| Timeouts | Split large files or ask hosting to increase limits |
🔧 When to Use What: MySQL® vs. phpMyAdmin vs. Wizard
| Task | Tool |
|---|---|
| Beginner DB setup | MySQL Database Wizard |
| Advanced data manipulation | phpMyAdmin |
| Creating/deleting DBs | MySQL Databases |
| Remote access setup | Remote MySQL |
Use these tools in combination for efficient and secure management.
📘 Final Notes
The Manage My Databases feature in cPanel provides a powerful yet user-friendly environment for managing all your database needs. Whether you’re a beginner creating your first WordPress blog or a developer optimizing a complex web application, this interface has the tools you need.
Understanding and using it well can save you hours of frustration and prevent data loss.
🧭 Next Steps
Now that you understand how to use Manage My Databases:
- Explore phpMyAdmin more deeply.
- Learn how to schedule automated backups.
- Optimize tables and indexes for performance.
- Upgrade to MariaDB or explore remote cluster databases.
🚀 Takeaway
You don’t need to be a database engineer to manage MySQL efficiently on cPanel. With the right tools and good habits, your data will remain secure, fast, and ready to power your site 24/7.
🔔For more tutorials like this, consider subscribing to our blog.
📩 Do you have questions or suggestions? Leave a comment or contact us!
🏷️ Tags: cPanel, database management, MySQL, phpMyAdmin, cPanel tutorial, web hosting, site administration, WordPress, website backup, database security
📢 Hashtags: #cPanel, #MySQL, #phpMyAdmin, #DatabaseTutorial, #WebsiteSecurity, #HostingGuide, #WebDevelopment, #WordPressTips, #BackupDatabase, #TechTutorials
✅ Summary
The cPanel Manage My Databases interface is essential for web developers and site owners. With this guide, you now know how to create databases, assign users, manage data using phpMyAdmin, and ensure everything is secure and backed up. Make database management a regular part of your website maintenance workflow.
