

⏲️ Estimated reading time: 7 min
Table of Contents
✅ cPanel Database Wizard: Step-by-Step Guide to Create MySQL Databases Easily. Learn how to use the cPanel Database Wizard to create and manage MySQL databases effortlessly. This beginner-friendly guide walks you through every step with clarity and best practices.
🧠 What is the cPanel Database Wizard?
Managing databases might seem intimidating for beginners, but cPanel’s Database Wizard simplifies the process dramatically. Whether you’re installing WordPress, setting up custom web applications, or connecting to MySQL manually, the Database Wizard ensures even non-technical users can easily create and configure their database with user privileges.
The Database Wizard in cPanel is a guided tool that streamlines the entire process into four clear steps:
- Create a Database
- Create a Database User
- Assign User Privileges
- Complete Setup
Let’s dive into each of these steps and see how you can use this feature efficiently.
🛠️ Why Use the Database Wizard in cPanel?
There are multiple ways to create a MySQL database in cPanel, but the Database Wizard is specifically useful because:
- ✅ It’s user-friendly and perfect for beginners.
- ✅ It ensures no steps are missed (like assigning privileges).
- ✅ It reduces errors that can happen with manual configurations.
- ✅ It helps prepare your hosting environment for apps like WordPress, Joomla, Drupal, etc.
🚀 How to Access the cPanel Database Wizard
To access the Database Wizard:
- Login to your cPanel account using your hosting credentials.
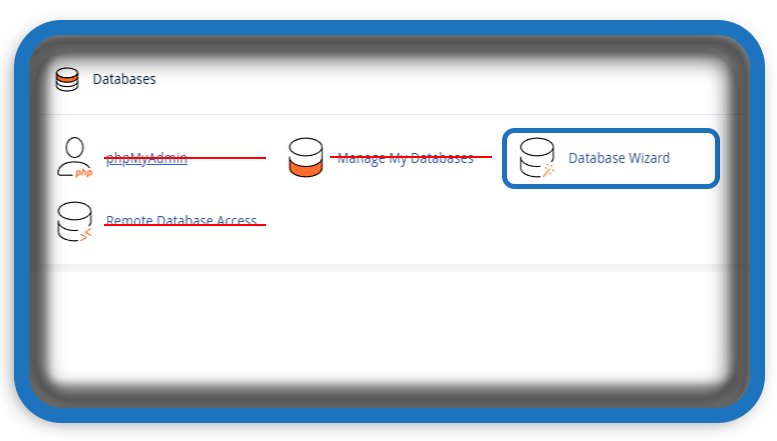
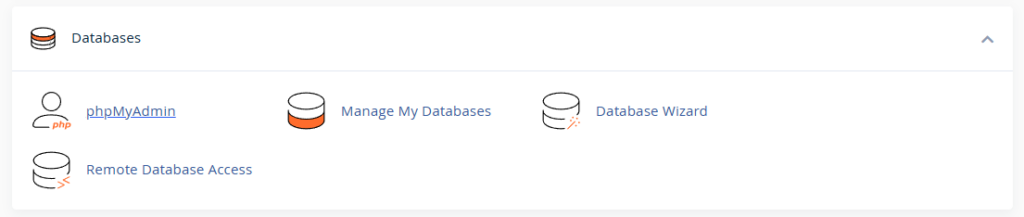
- Scroll down to the Databases section.
- Click on MySQL® Database Wizard.
You are now ready to begin creating your new database.
🧱 Step 1: Creating a New MySQL Database
After clicking the Database Wizard, you’ll be on Step 1: Create a Database.
- You’ll see a text field labeled “New Database”.
- Enter a name for your database.
⚠️ This name will be prefixed with your cPanel username, e.g.,youruser_dbname. - Click Next Step to proceed.
📌 Pro Tip: Use meaningful database names like wp_blog, crm_data, or shop_orders.
👤 Step 2: Creating a Database User
Once your database is created, the wizard prompts you to create a user who will interact with the database.
Here’s what to do:
- Enter a username (also prefixed with your cPanel name).
- Create a strong password or use the password generator.
- Confirm the password.
- Click Create User.
🔐 Security Tip: Always use complex passwords to prevent brute-force attacks. Save this password securely.
🔑 Step 3: Assigning User Privileges
Now that you’ve created a database user, you need to assign privileges these determine what the user can do with the database.
You have two options:
- ALL PRIVILEGES (Recommended for most WordPress installs or full admin control)
- Or select individual privileges like SELECT, INSERT, DELETE, etc.
After selecting, click Next Step to save and apply the settings.
✅ The database and user are now connected!
✅ Step 4: Completion Message
Once privileges are assigned, you’ll see a confirmation message like:
“User
youruser_dbuserwas added to the databaseyouruser_dbname.”
🎉 Congratulations! You’ve successfully created a MySQL database using the cPanel Database Wizard.
🌐 How to Use This Database for WordPress
If you’re setting up WordPress or any CMS:
- Start your WordPress installation.
- When prompted, enter:
- Database Name:
youruser_dbname - Database Username:
youruser_dbuser - Database Password: The one you set earlier
- Database Host: Usually
localhost
- Database Name:
- Continue the installation.
✔️ Your database is now powering your WordPress site!
🧰 Managing the Database After Creation
Once your database is live, here are a few tools in cPanel that help manage it:
1. phpMyAdmin
- Navigate to
phpMyAdminin the Databases section. - Use this to:
- View/edit tables
- Import/export data
- Run SQL queries
- Backup or restore data
2. MySQL Databases
- Lets you:
- View all your databases
- Delete or rename them
- Add or remove users manually
- Repair/Check databases
🧼 Best Practices for Database Management
To keep your database secure and functional, follow these best practices:
- 💾 Backup Regularly: Use cPanel’s backup tool or phpMyAdmin to export databases.
- 🧹 Clean Unused Tables: Especially after uninstalling plugins or apps.
- 🔒 Rotate Passwords: Change user passwords periodically.
- 🛡️ Limit Privileges: If a user doesn’t need full access, grant only what’s necessary.
- ⚠️ Avoid “root” level accounts unless absolutely needed.
📉 Common Issues and Fixes
❌ Error: “Cannot connect to database”
- Ensure correct credentials.
- Confirm the user has privileges.
- Use
localhostas the hostname unless specified otherwise.
Database not listed in phpMyAdmin
- Wait a few seconds and refresh.
- Check if the user was correctly added to the database.
- Use the MySQL Databases tool to troubleshoot.
❌ Permission Denied Errors
- Revisit the privilege assignment.
- Re-add user to the database and assign
ALL PRIVILEGES.
🔄 Automating with Cron or Scripts (Advanced)
Once familiar with your databases, you might want to automate backups or table optimizations. You can:
- Set up a Cron Job in cPanel to run a
mysqldumpcommand. - Use plugins (in WordPress) for scheduled database optimization.
- Run SQL optimization scripts via phpMyAdmin.
Example Cron command:
mysqldump -u youruser -pYourPassword youruser_dbname > /home/youruser/backups/db_backup.sql
🛑 Ensure file permissions are secure if you’re storing backups on the server.
🔄 Alternatives to Database Wizard
While the Wizard is easy to use, you might prefer:
- Command-line MySQL (for advanced users)
- External Tools like Adminer
- Scripts from Installers like Softaculous auto-creates databases during installs
Still, for most hosting users, the Database Wizard remains the fastest and safest way to set things up without making errors.
🧩 When to Use Manual Database Setup Instead
You might want to skip the wizard and use manual setup if:
- You’re importing an existing database
- You’re restoring from backup
- You’re integrating with custom software
- You need to assign multiple users to one database with different roles
Otherwise, the Wizard is perfect for everyday website setup.
🏁 Master Your Database Environment
Using the cPanel MySQL Database Wizard is an essential skill for any website owner or beginner web developer. With a few clicks, you create a robust, secure, and flexible database environment ready for WordPress, custom apps, or anything else that relies on MySQL.
It simplifies database creation, reduces error rates, and gives you full control over user access. Whether you’re building your first site or managing multiple databases across domains, the wizard saves time and improves reliability.
🏁 What You’ve Learned Today:
- ✅ What the cPanel Database Wizard is
- ✅ How to create a MySQL database using it
- ✅ Assign user privileges properly
- ✅ Use your database with WordPress or other apps
- ✅ Troubleshoot common issues
- ✅ Follow best practices for performance and security
🧩Tips for Going Further
- Learn to optimize databases manually via SQL queries
- Explore database indexing to speed up queries
- Use version control or schema tracking for large applications
- Combine database management with site monitoring tools
📌Stay in Control of Your Site’s Data
Never underestimate the importance of a properly configured database. It’s the heart of your CMS, your plugins, and your user data. Mastering tools like cPanel’s Database Wizard not only improves your site’s stability it also gives you confidence to handle deeper customization and scaling.
🔔For more tutorials like this, consider subscribing to our blog.
📩 Do you have questions or suggestions? Leave a comment or contact us!
🏷️ Tags: cPanel, MySQL, Database Wizard, WordPress, Hosting Tools, phpMyAdmin, cPanel guide, create MySQL database, cPanel tutorial, website database
📢 Hashtags: #cPanel, #DatabaseWizard, #MySQL, #WebHosting, #WebsiteSetup, #phpMyAdmin, #HostingTutorial, #WordPressDatabase, #MySQLGuide, #SiteManagement
See also: 10 Essential WordPress Cron Jobs for a Reliable Blog
