


⏲️ Estimated reading time: 13 min
Table of Contents
Learn how to cook octopus so it turns tender, juicy, and full of flavor. This step-by-step method uses a cold-water thaw, pepper, vinegar, and bay leaves, plus a simple “dip and curl” trick for better texture. Includes timing, serving ideas, and common mistakes to avoid.
Read also: 10 Essential WordPress Cron Jobs for a Reliable Blog
Why Octopus Feels “Hard” and How to Fix It
Octopus tastes incredible when it is cooked right. Yet many people try it once, get a rubbery bite, and never touch it again. The good news is simple: octopus is not difficult. It just needs a calm approach, correct thawing, and the right simmer time.
Octopus muscle contains lots of collagen. Collagen can feel tough at first. With gentle heat over time, collagen turns into gelatin. That change creates the “buttery” texture everyone wants. If you rush the process, you can end up with chewy meat. If you overcook it, you can also get a soft, mushy texture that loses character.
So you want the sweet spot: fork-tender, still holding shape, and ready for salads, grilling, or a quick sear.
The Core Idea Behind Georgi Suișenist’s “Secret” Method
This post is based on a simple, practical technique shared as a “secret recipe” style walkthrough. The method focuses on four key moves: buy frozen, thaw in cold water, season the boiling liquid with pepper + vinegar + bay leaves, then use a “dip and submerge” step so the tentacles curl nicely before you simmer until tender.
It is not fancy. It is just smart cooking.
Choosing Octopus the Right Way in Romania and Beyond
In many places, you will find octopus mainly frozen. That is normal. In the source recipe, the point is very clear: most octopus available locally comes frozen because it is imported, so you should lean into that reality and buy it frozen rather than “pre-thawed.”
Frozen can actually be an advantage.
Freezing helps break down muscle fibers a bit. That can improve tenderness, especially when you cook it gently. It also gives you better control because you decide how it thaws.
How to Thaw Octopus So It Stays Tender
Thawing is where many people ruin the texture before cooking even starts.
The method here is simple.
You put the frozen octopus in cold water. You do not use warm or hot water. The source warns that warm water can cause uneven thawing and may start “premature cooking” on the outside, which can mess with texture.
Cold-Water Thaw Step-by-Step
- Place the frozen octopus in a clean container or bowl.
- Cover it fully with cold water.
- Replace the water once or twice if it warms up.
- Wait until the octopus is completely thawed.
In the source walkthrough, the thaw can take around 30 minutes depending on size, water volume, and how frozen it is.
Why Cold Water Works Faster Than You Think
Cold water transfers heat more efficiently than cold air in a fridge. So the octopus thaws faster than you expect, while still staying in a “safe” temperature zone longer than room-temperature thawing.
If you want an even safer approach, you can thaw overnight in the fridge. That takes longer, but it is also very controlled. Use the cold-water method when you need speed and you can monitor it.
Ingredients for the Boiling Liquid
This recipe uses a short list of ingredients that focus on tenderness and aroma.
Pepper
Use any pepper you have. The source says “any kind you can find,” and you can add as much as you like for a stronger pepper note.
Whole peppercorns work great. Ground pepper also works, though it can cloud the liquid.
Vinegar
Add vinegar to the cooking water. The source explains the vinegar helps soften the octopus.
White vinegar is fine. Wine vinegar also works well. Many Mediterranean-style recipes use red wine vinegar or balsamic vinegar for extra flavor. (Mia Kouppa)
Bay Leaves
Bay leaves add a gentle herbal aroma. The source suggests being careful with the amount. For a normal pot, two or three leaves are enough.
Water
Use enough water to fully cover the octopus once it is in the pot. That is it.
Equipment You’ll Want
A good result is easier when you use the right tools.
Large Pot With Lid
Octopus needs space. A cramped pot can cause uneven cooking.
Tongs
Tongs help you do the “dip and curl” step without splashing yourself.
Timer
Octopus is not a “set it and forget it” thing. You should start checking tenderness at a reasonable time.
Optional Food Thermometer
Seafood safety guidance often recommends cooking seafood to 145°F (63°C) and until it turns opaque and separates easily. (FoodSafety.gov)
Octopus texture matters more than a single number, but temperature can still help if you like precision.
The “Dip and Curl” Technique That Makes Octopus Look and Feel Better
This is one of the most memorable parts of the method.
When the water boils, you do not just drop the octopus in and walk away.
You “baptize” it.
You dip the octopus into the boiling water so the tentacles start to curl, then lift it out, then dip again. The source describes repeating several times, not only three times. The point is the same: you help the tentacles curl and set nicely before the full simmer.
This technique shows up in other cooking traditions too. Many cooks dip the octopus three times before fully submerging it. (FogoCharcoal.com)
Why This Step Helps
It does two things.
It improves appearance because the tentacles curl cleanly.
It can also help the outer layer “set” so the skin stays more intact while cooking. That can matter if you want a nice look for plating or later grilling.
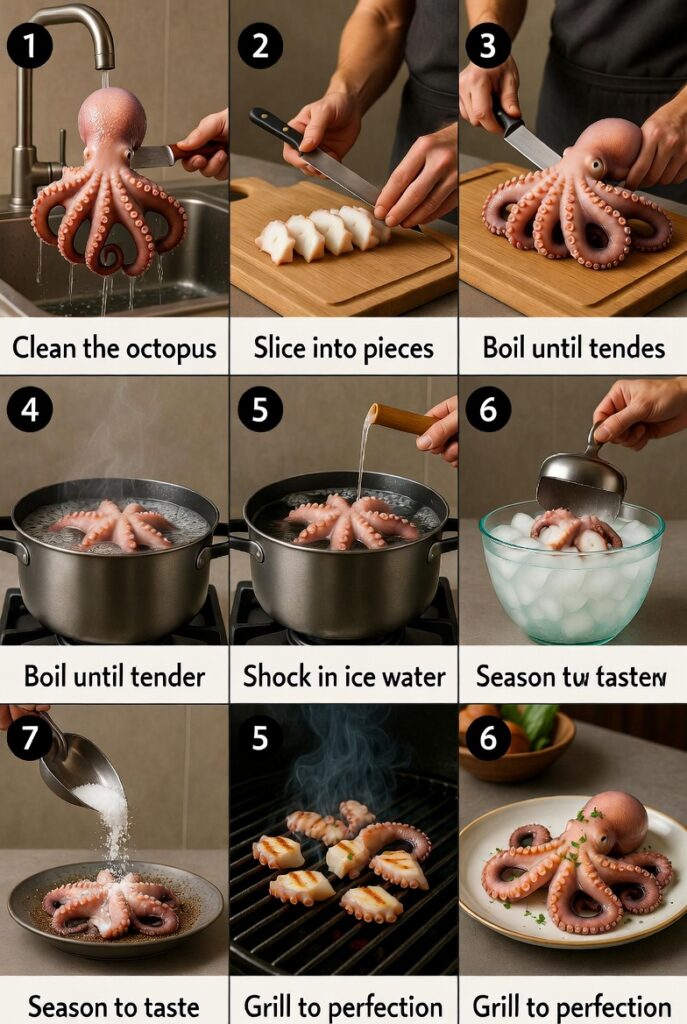
Step-by-Step: Boiling Octopus the Georgi Way
Now you put everything together.
Step 1: Thaw Completely
Do not rush this. The source insists the octopus must be completely thawed before it goes into the pot.
Step 2: Build Your Cooking Liquid
Fill the pot with enough water to cover the octopus.
Add pepper.
Add vinegar.
Add 2–3 bay leaves.
You can do this before the water boils.
Step 3: Bring the Water to a Boil
Once it boils, reduce to a steady simmer if your pot boils too aggressively. You want active bubbling, but not violent turbulence.
Step 4: Dip and Curl
Hold the octopus by the head/body with tongs.
Dip the tentacles into the boiling water.
Lift it out.
Repeat several times until the tentacles curl nicely.
Then submerge the octopus fully.
Repeat for the next octopus if you cook more than one. The source boils two at a time in the pot.
Step 5: Simmer Until Tender
The source gives a general simmer range of about 35–45 minutes, depending on the octopus. Some cook faster. Some cook slower.
This matches common guidance in many recipes that simmer octopus around 30–45 minutes until fork-tender, though exact time depends on size and thickness. (theocooks.com)
Step 6: Check Tenderness the Right Way
Do not guess.
After 30 minutes, start checking.
Use a fork or a small knife and pierce the thickest part of a tentacle. You want it to slide in with slight resistance, not fight you, and not collapse.
If it still feels tight and springy, give it 5–10 more minutes and test again.
Step 7: Remove and Rest
Once tender, remove the octopus carefully.
At this stage, you can serve it as boiled octopus, or you can cool it and finish it on the grill or in a hot pan for crisp edges.
The source simply pulls it out, shows how beautiful it looks, and it is ready to eat.
Timing Guide That Actually Works
Time depends on size. Still, you can use a practical guide.
Small Octopus
Often tender in 25–35 minutes.
Medium Octopus
Often tender in 35–45 minutes.
Large Octopus
Can take longer. Some methods keep it just below boiling for an hour or more. (honest-catch.com)
The best rule is this: cook until fork-tender, then stop. Octopus can cross from tender to mushy if you forget it.
How Much Vinegar, Pepper, and Bay Leaf Should You Use
The source keeps it flexible.
That flexibility is good, but people still want numbers.
A Balanced Starting Point
For a medium pot (around 3–4 liters of water):
Pepper: 1–2 teaspoons ground, or 1 tablespoon peppercorns.
Vinegar: 2–4 tablespoons.
Bay leaves: 2–3 leaves.
Then you adjust.
If you love a sharper note, add more vinegar.
If you want more aroma, add one more bay leaf, but do not overdo it because bay can turn bitter.
What to Do After Boiling
Boiled octopus tastes great, but the magic often happens after.
Option 1: Serve It Warm With Olive Oil and Lemon
Slice tentacles.
Add olive oil, lemon juice, salt, pepper, and parsley.
This gives you a clean, Mediterranean feel.
Option 2: Chill It and Make a Salad
Cool the octopus, then slice it.
Add red onion, cucumber, parsley, olive oil, vinegar or lemon, and a little garlic.
This works well for meal prep too.
Option 3: Grill or Sear for Crispy Edges
Boil first. Always.
Then dry the tentacles well.
Brush with olive oil.
Grill on high heat or sear in a very hot pan for 1–2 minutes per side.
This creates a smoky crust while keeping the inside tender. Greek-style approaches often do exactly this after a simmer. (Mia Kouppa)
Common Mistakes That Make Octopus Rubbery
Most failures come from a few predictable mistakes.
Thawing in Warm Water
The source warns against it for a reason. Warm water can start cooking the outside before the inside thaws. That hurts texture and can increase food safety risk.
Boiling Too Hard
Aggressive boiling can tear skin and can rough up the surface.
A steady simmer is usually better.
Not Checking Tenderness
Time is not the goal. Texture is.
Start testing and stop at the right moment.
Salting Too Early Without Tasting
Some octopus is naturally salty, especially if it was treated in processing.
Many Mediterranean recipes advise caution with salt during cooking. (My Greek Dish)
Taste later, then season.
Food Safety Notes You Should Not Skip
Octopus is seafood. Handle it with care.
Keep it cold while thawing.
Do not leave it on the counter for long.
Cook it thoroughly.
Official food safety guidance often recommends cooking seafood to 145°F (63°C) and until it is opaque and separates easily. (FoodSafety.gov)
If you are pregnant, immunocompromised, or cooking for someone at higher risk, follow stricter safety practices and avoid cross-contamination.
Storage and Reheating Without Ruining Texture
Octopus stores well if you treat it gently.
Refrigeration
Cool cooked octopus quickly.
Store in an airtight container.
Use within 2–3 days for best texture.
Freezing Cooked Octopus
You can freeze it after boiling.
Slice it, portion it, then freeze.
Texture stays decent, especially if you later grill or sear.
Reheating
Avoid microwaving for long.
Use low heat in a pan with a splash of water or olive oil.
Or reheat quickly on a grill.
Flavor Variations That Still Respect the Original Method
Once you master the base, you can experiment while keeping the same structure.
Garlic and Herbs
Add crushed garlic, thyme, or oregano to the cooking water.
Wine + Vinegar Mix
Many Greek-style recipes simmer octopus with wine and vinegar for deep aroma. (My Greek Dish)
Citrus Finish
Use lemon zest and fresh lemon juice at the end.
Do not boil lemon for the whole time because bitterness can appear.
Serving Ideas for a Full Meal
Octopus can be the star or part of a bigger plate.
With Potatoes
Boiled potatoes with olive oil, parsley, lemon, and sliced octopus is classic.
With Rice or Couscous
A warm grain bowl works well with grilled octopus pieces.
With Roasted Vegetables
Roasted peppers, zucchini, and onions pair beautifully.
Frequently Asked Questions
How do I know the octopus is fully thawed?
When the body and tentacles feel flexible and no icy core remains, it is thawed. The source stresses “completely thawed” before boiling.
Can I thaw octopus in hot water to save time?
Avoid it. Warm or hot water can start cooking the outside, causing uneven texture and higher risk. The method specifically says to use cold water.
Why add vinegar to the cooking water?
Vinegar can help soften the octopus and also adds a subtle tang. The source calls it out as part of the “secret.”
Do I need bay leaves?
You do not “need” them, but they add aroma. The source suggests 2–3 bay leaves for the pot size used.
What is the dipping step really for?
It helps the tentacles curl and can help the outer layer set. The source demonstrates repeated dipping before full submersion.
How long should I boil octopus?
Often 35–45 minutes for medium sizes, but it depends. The source gives that range and recommends adjusting for the specific octopus.
Can octopus overcook?
Yes. If you cook far past tender, it can go mushy and lose its pleasant bite. Many recipes warn about overcooking. (theocooks.com)
What is the safe internal temperature for seafood?
Common guidance recommends 145°F (63°C) for seafood, and cooking until it is opaque and separates easily. (FoodSafety.gov)
Should I salt the water?
You can, but be cautious. Some recipes advise not adding salt early because octopus can already taste salty. Season later after tasting. (My Greek Dish)
Can I grill octopus without boiling first?
You can, but boiling first is far more reliable for tenderness. A popular approach is simmer first, then grill quickly for char. (Mia Kouppa)
Final Ideas That Help You Avoid Rubbery Octopus
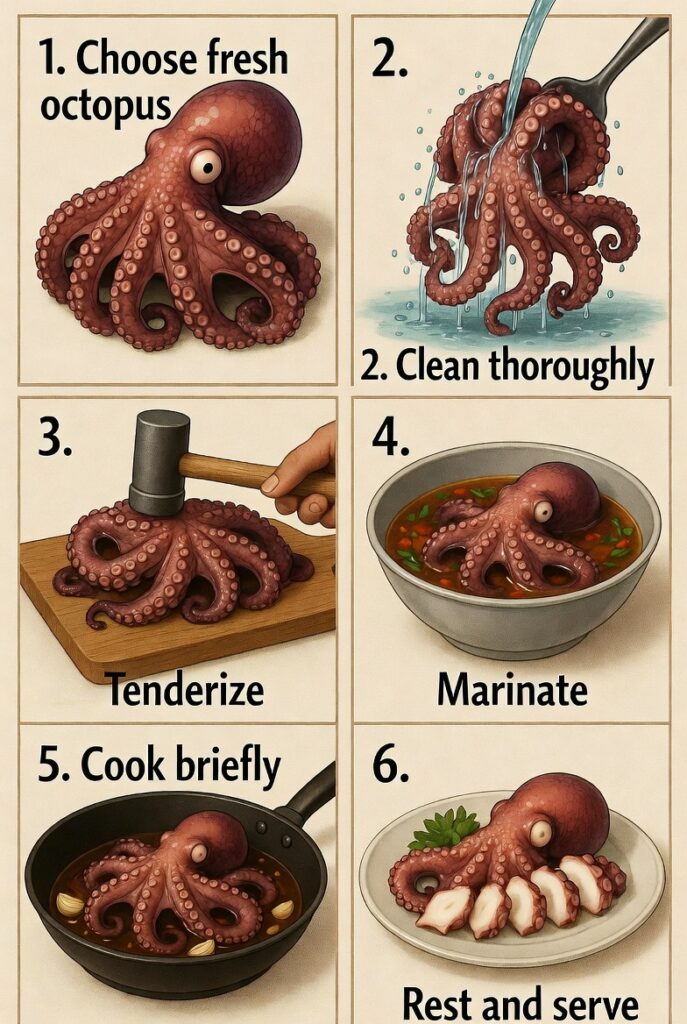
You do not need complicated tricks to cook octopus well. You need control.
Buy it frozen when that is the normal market option.
Thaw it in cold water, not warm water.
Build a simple boiling liquid with pepper, vinegar, and bay leaves.
Use the dip-and-curl step.
Then simmer until it turns fork-tender, and stop at the right moment.
From there, you can eat it right away, chill it for salad, or grill it fast for smoky edges.
⚠️ DISCLAIMER
This article is for informational purposes and general cooking education. Food handling and cooking safety can vary by kitchen, equipment, and ingredient quality. When in doubt, consult official food safety guidance and use a food thermometer. Information here is based on the provided source recipe plus research from authoritative food safety references. (FoodSafety.gov)
🔔 For more tutorials like this, consider subscribing to our blog.
📩 Do you have questions or suggestions? Leave a comment or contact us!
🏷️ Tags: how to cook octopus, boiled octopus recipe, tender octopus, octopus thawing, octopus with vinegar, bay leaf octopus, seafood cooking tips, Mediterranean octopus, octopus grilling, kitchen how-to
📢 Hashtags: #octopus #seafood #cooking #recipe #mediterraneanfood #homecooking #foodtips #kitchenhacks #healthymeals #howto
