


⏲️ Estimated reading time: 5 min
Table of Contents
Cloudflare Settings for WordPress The First Rules You Must Apply. Learn the essential Cloudflare setup steps for your WordPress website. From DNS proxy to SSL, caching, and bypass rules, this guide explains the first and most important settings you must apply to secure and speed up your site.
The First Cloudflare Rules
Read also: Ousmane Dembélé: From Barcelona Failure to Ballon d’Or
✅ Cloudflare is one of the most powerful tools you can use to secure and accelerate your WordPress website. It works as a global content delivery network (CDN), optimizing site speed, reducing server load, and protecting against attacks like DDoS.
But to make it work perfectly, you must start with the first essential configuration rules. Let’s go step by step.
🔹 Step 1: Enable Proxy (Orange Cloud)
When you add your domain to Cloudflare, it automatically scans your DNS records.
To make sure Cloudflare protects and optimizes your site, turn on the orange cloud next to your main records:
- A Record →
yourdomain.com→ points to your server IP → ☁️ orange - CNAME Record →
www→ points toyourdomain.com→ ☁️ orange
✅ Orange = Cloudflare proxy enabled (traffic filtered through Cloudflare)
⚠️ Gray = Direct traffic (no caching, no security)
This is the first visual confirmation that your website is actually running through Cloudflare’s global network.
🔹 Step 2: Activate SSL/TLS Protection
In your Cloudflare Dashboard → SSL/TLS → Overview:
- Choose Full (strict) mode.
This ensures data is encrypted end-to-end (visitor → Cloudflare → origin server). - Check the Edge Certificate section.
Cloudflare automatically provides a free SSL certificate for your site. - Under Edge Certificates, turn ON:
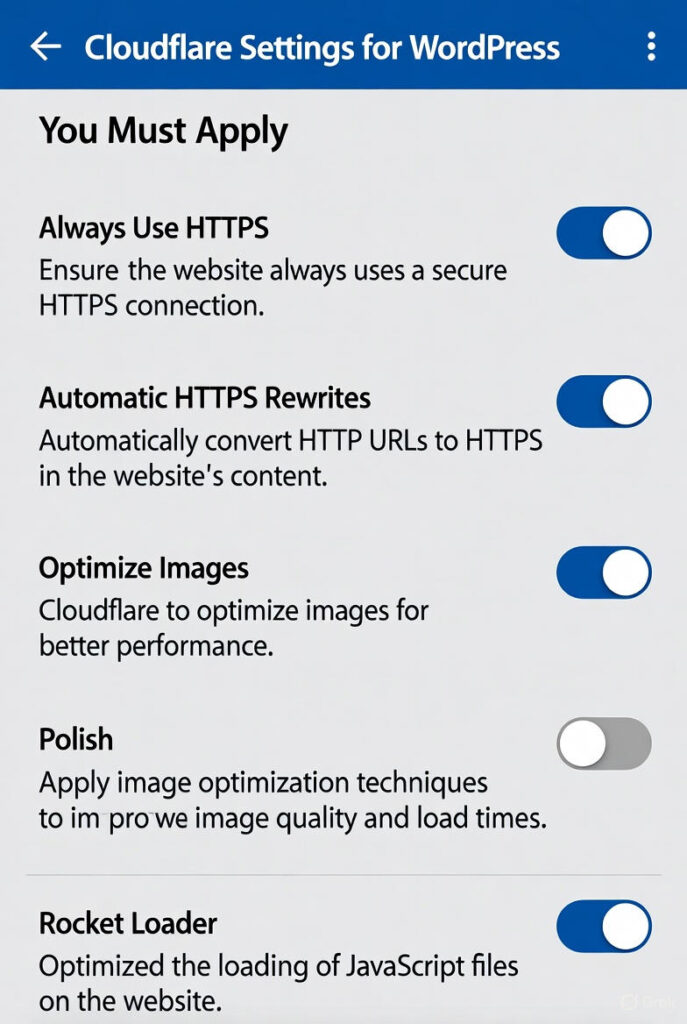
- Always Use HTTPS
- Automatic HTTPS Rewrites
These two settings force all visitors to use secure connections and prevent mixed content errors.
🔹 Step 3: Add Page Rules or Cache Rules
Cloudflare lets you create custom rules to define what content should be cached or bypassed. For WordPress, these are the golden rules:
✅ Rule 1: Cache Everything for Static Files
Expression:
(http.host eq "yourdomain.com" and http.request.uri.path contains "/wp-content/")
Action:
- Cache Level → Cache Everything
- Edge TTL → 1 month
- Browser TTL → 1 month
This tells Cloudflare to store images, CSS, and JavaScript files on its edge servers for faster delivery.
✅ Rule 2: Bypass WordPress Admin and Login
Expression:
(http.request.uri.path contains "/wp-admin" or
 http.request.uri.path contains "/wp-login.php")
Action:
- Cache Level → Bypass
You don’t want your admin area cached otherwise, you may face login issues or stale dashboard data.
✅ Rule 3: Redirect HTTP → HTTPS
Expression:
not starts_with(http.request.uri, "https")
Action:
- Forward to →
https://yourdomain.com/$1 - Status Code: 301 (Permanent Redirect)
This makes sure all traffic is redirected to HTTPS automatically.
🔹 Step 4: Fine-Tune Your Cache Settings
Go to Caching → Configuration in Cloudflare:
- Caching Level: Standard
- Browser Cache TTL: 1 Month
- Always Online: Enabled
- Tiered Caching: Enabled
- Development Mode: Keep Off unless you’re editing your site
Cloudflare will now serve cached static content instantly and reduce the load on your server.
🔹 Step 5: Test Your Setup
After completing the steps above, run these quick checks:
| Test | Command | Expected Result |
|---|---|---|
| Verify Cloudflare active | `curl -I https://yourdomain.com | grep -i cf-` |
| Check cache status | `curl -I https://yourdomain.com/wp-content/uploads/test.jpg | grep -i cf-cache-status` |
| Admin area check | `curl -I https://yourdomain.com/wp-admin/ | grep -i cf-cache-status` |
| Sitemap check | `curl -I https://yourdomain.com/sitemap_index.xml | grep -i cf-cache-status` |
⚡ Bonus: Recommended Cloudflare Settings
To maximize speed and security:
- Turn ON Brotli Compression
- Turn ON Early Hints
- Use Rocket Loader (only if no JS conflicts)
- Enable Polish and Mirage (if your plan allows)
- Under Speed → Optimization, enable Auto Minify for JS, CSS, and HTML
📘 Quick Recap Checklist
✅ DNS: Orange cloud (Proxy ON)
✅ SSL/TLS: Full (strict)
✅ Cache Rules: Configured (Static Cache + Admin Bypass)
✅ Redirect HTTPS: Enabled
✅ Site loads with padlock 🔒
✅ Admin area works normally
If all these conditions are true congratulations! 🎉
Your WordPress website is now fully optimized for Cloudflare.
⚙️ Pros and Cons of Using Cloudflare
| Pros | Cons |
|---|---|
| Faster site loading worldwide | Free plan limits customization |
| Free SSL and DDoS protection | Some dynamic content may require fine-tuning |
| Global CDN with caching | APO (Automatic Platform Optimization) is paid |
| Automatic HTTPS redirects | Requires DNS propagation at setup |
🌍 Real Example: andreiflorin.ro Configuration
After applying these rules, the site andreiflorin.ro reached:
- Cache HIT on static files
- DYNAMIC/BYPASS for feeds and sitemaps
- 0.3s TTFB globally (verified with
curland GTmetrix)
That’s the practical proof that these first Cloudflare rules work perfectly for WordPress performance and SEO.
🌟 Smart Ending: The Key to a Fast WordPress Site
Every millisecond matters. Configuring Cloudflare correctly is not just about speed it’s about security, reliability, and SEO ranking stability.
Once these first rules are in place, you can expand to:
- WAF (Web Application Firewall)
- Rate Limiting
- Custom Page Rules for specific URLs
And from that moment, your WordPress site runs like a global powerhouse.
Link Sources
(Cloudflare Documentation)
(WordPress.org)
(GTmetrix)
🔔 For more tutorials like this, consider subscribing to our blog.
📩 Do you have questions or suggestions? Leave a comment or contact us!
🏷️ Tags: cloudflare, wordpress optimization, ssl setup, dns proxy, cdn performance, cache rules, page rules, website speed, https redirect, caching configuration
📢 Hashtags: #CloudflareSetup, #WordPressSpeed, #SSL, #CDN, #WebPerformance, #WordPressSecurity, #Caching, #HTTPS, #WebsiteOptimization, #SpeedUpWordPress

