⏲️ Estimated reading time: 2 min
How to Hardcode Subtitles with VLC (Step-by-Step Guide). Want to hardcode subtitles into your video using VLC? Here’s a simple step-by-step guide to permanently embed subtitles into your video file using VLC Media Player.
What Does “Hardcode Subtitles” Mean?
Hardcoding subtitles means permanently embedding them into the video. Unlike soft subtitles, hardcoded ones cannot be turned off they become part of the video image itself. This is useful for sharing videos where subtitle compatibility may be an issue.
How to Hardcode Subtitles Using VLC
⚠️ Important: VLC itself doesn’t directly hardcode subtitles unless you use the Convert/Save function with proper settings.
Step-by-Step Guide:
- Prepare Your Files:
- Make sure your video file and subtitle file (
.srt,.ass, etc.) have the same filename. - Example:
video.mp4video.srt
- Make sure your video file and subtitle file (
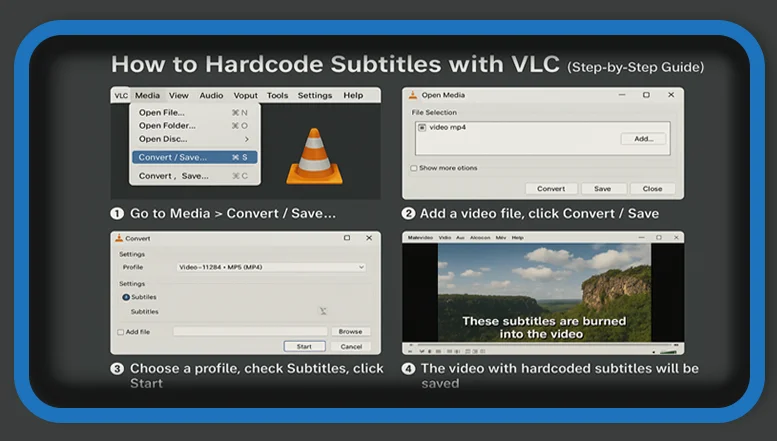
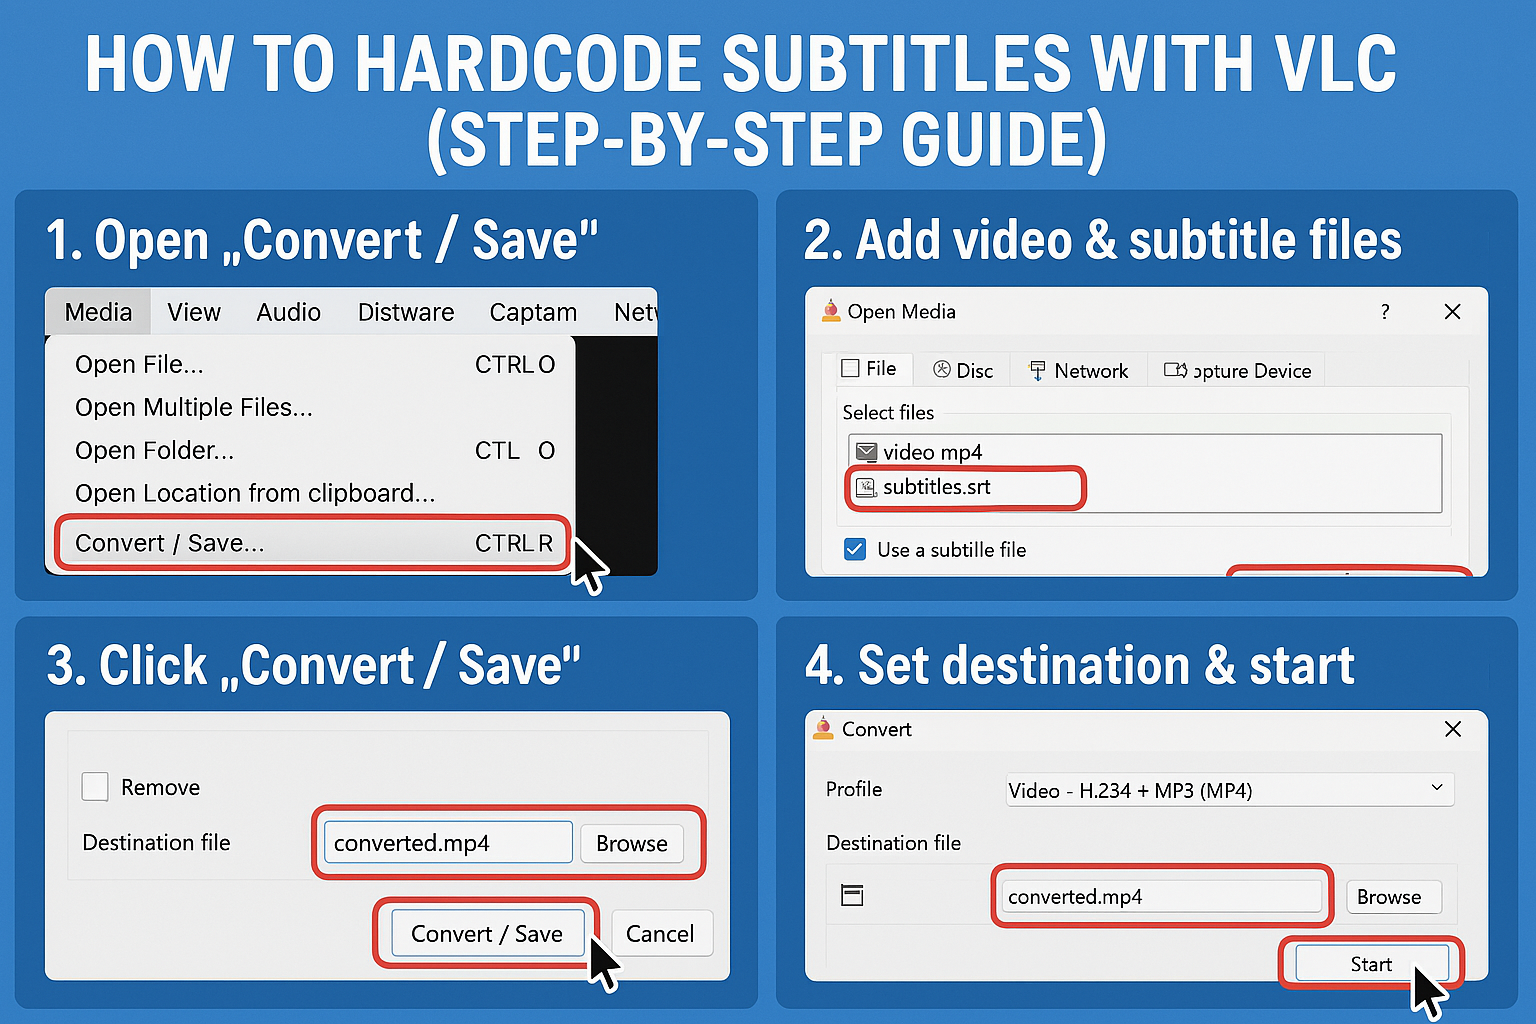
- Open VLC Media Player.
- Go to Media > Convert/Save.
- Click Add and select your video file.
- Check the box: “Use a subtitle file” and load the
.srtfile. - Click Convert/Save.
- Under Profile, choose a format that supports subtitles (e.g.,
Video - H.264 + MP3 (MP4)). - Click the wrench icon next to the profile:
- Go to the Subtitles tab.
- Check “Subtitles” and “Overlay subtitles on the video”.
- Set your destination file name with
.mp4. - Click Start.
VLC will now render and insert the subtitles into your video.
Tips for Better Results
- Use .srt format for best compatibility.
- Make sure your subtitle file is synced with the video.
- For more advanced styling (fonts, colors), consider using
.assfiles and tools like HandBrake instead.
🏷️ Tags: VLC, Hardcode Subtitles, VLC Subtitles, Video Editing, How To Guide, MP4 Subtitles, SRT Files, Embed Subtitles, VLC Tutorial, Convert Video
Only logged-in users can submit reports.
Discover more from HelpZone
Subscribe to get the latest posts sent to your email.