⏲️ Estimated reading time: 2 min
Creating a mailing list in cPanel is a great way to manage email communications for newsletters, announcements, or customer interactions. Follow this step-by-step guide to set up a efficiently.
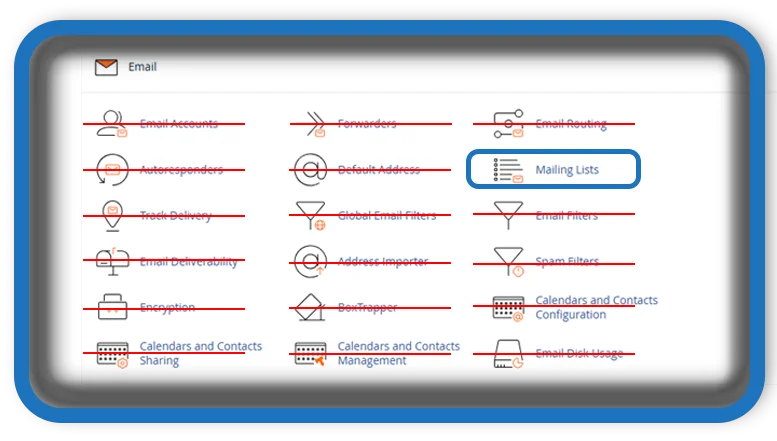
1: Access the Mailing List Feature
- Log in to your cPanel account.
- Navigate to the Email section and select Mailing Lists.
2: Create a New Mailing List
- Click on the Create button.
- Enter the mailing list name (e.g., “newsletter”).
- Choose the domain.
- Set a strong password for list administration.
- Select the access level:
- Public: Anyone can subscribe.
- Private: Only approved members can join.
- Click Create to finalize the setup.
3: Manage
- Go back to the Mailing Lists section.
- Locate your new list and click Manage.
- Configure subscription settings, posting permissions, and member management.
4: Add Subscribers
- Under list management, find the Subscribers section.
- Manually add emails or provide a sign-up form for users.
- Set up confirmation settings to prevent spam subscriptions.
5: Sending Emails to Your List
- Use the email address to send messages (e.g., newsletter@yourdomain.com).
- Ensure you comply with anti-spam laws by including an unsubscribe option.
6: Monitor and Maintain the List
- Regularly check for bounced emails and inactive subscribers.
- Monitor email delivery reports for any issues.
- Update content to keep subscribers engaged.
By following these steps, you can efficiently manage a mailing list in cPanel and maintain effective communication with your audience.
Tags: cPanel, email marketing, email list, web hosting, newsletters, cPanel email, hosting tutorial, website management, email settings
Report an issue (max 5 words):
Only logged-in users can submit reports.
Discover more from HelpZone
Subscribe to get the latest posts sent to your email.